
When it comes to 3D printing, achieving the perfect print starts with a well-leveled bed. If you're looking for getting it just right: 10 steps to level a 3D printer bed, you've come to the right place. This guide will walk you through the essential steps to ensure your printer bed is perfectly aligned, leading to better adhesion and higher-quality prints.
Understanding the Importance of Bed Leveling
Why is bed leveling so crucial? A properly leveled bed ensures that the distance between the nozzle and the print surface is consistent across the entire area. If the bed is uneven, you may encounter issues such as poor adhesion, warping, or even nozzle clogs. Therefore, understanding the significance of this process is the first step in getting it just right: 10 steps to level a 3D printer bed.
Step-by-Step Guide to Leveling Your 3D Printer Bed
- Gather Your Tools: Before starting, ensure you have a piece of paper or a feeler gauge, and a wrench for adjusting the bed.
- Preheat the Printer: Heat your printer to the temperature you typically use for printing. This helps the bed expand and gives a more accurate leveling.
- Home the Printer: Use the printer's control panel to home the X, Y, and Z axes. This will set the starting point for leveling.
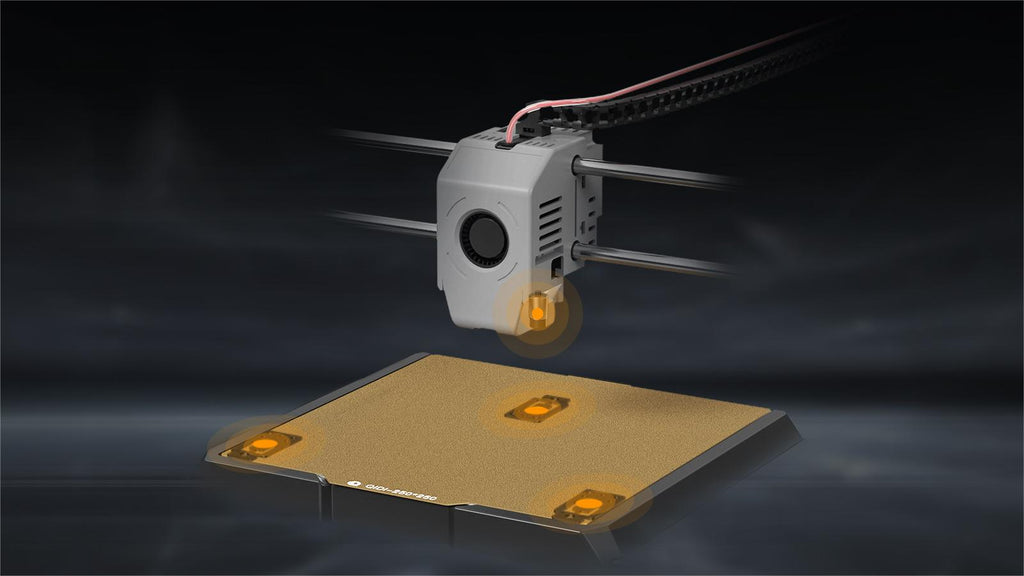
- Adjust the Bed Height: Move the nozzle close to the bed and place your paper underneath. Adjust the bed until you feel slight resistance when pulling the paper.
- Check All Corners: Repeat the process at each corner of the bed. Each corner may require different adjustments.
- Center the Bed: After leveling the corners, check the center of the bed. Adjust as necessary to ensure evenness.
- Recheck Corners: Go back and verify the corners again, as adjustments may have shifted them.
- Test Print: Perform a test print to see if the first layer adheres properly. If not, repeat the leveling process.
- Fine-Tune Settings: Adjust your slicer settings if necessary, particularly the first layer height and speed.
- Regular Maintenance: Make bed leveling a regular part of your maintenance routine to ensure consistent print quality.
Common Issues and Troubleshooting
Even after following the steps for getting it just right: 10 steps to level a 3D printer bed, you may still encounter issues. Common problems include uneven prints or poor adhesion. If you experience these, consider checking the following:
- Is the bed surface clean and free from debris?
- Are the bed screws tight and secure?
- Is the nozzle clogged or damaged?
Conclusion
Leveling your 3D printer bed is a fundamental skill that can significantly impact your printing success. By following these 10 steps to level a 3D printer bed, you can enhance your printing experience and achieve better results. For more detailed information, check out this 3D printer bed leveling guide.